
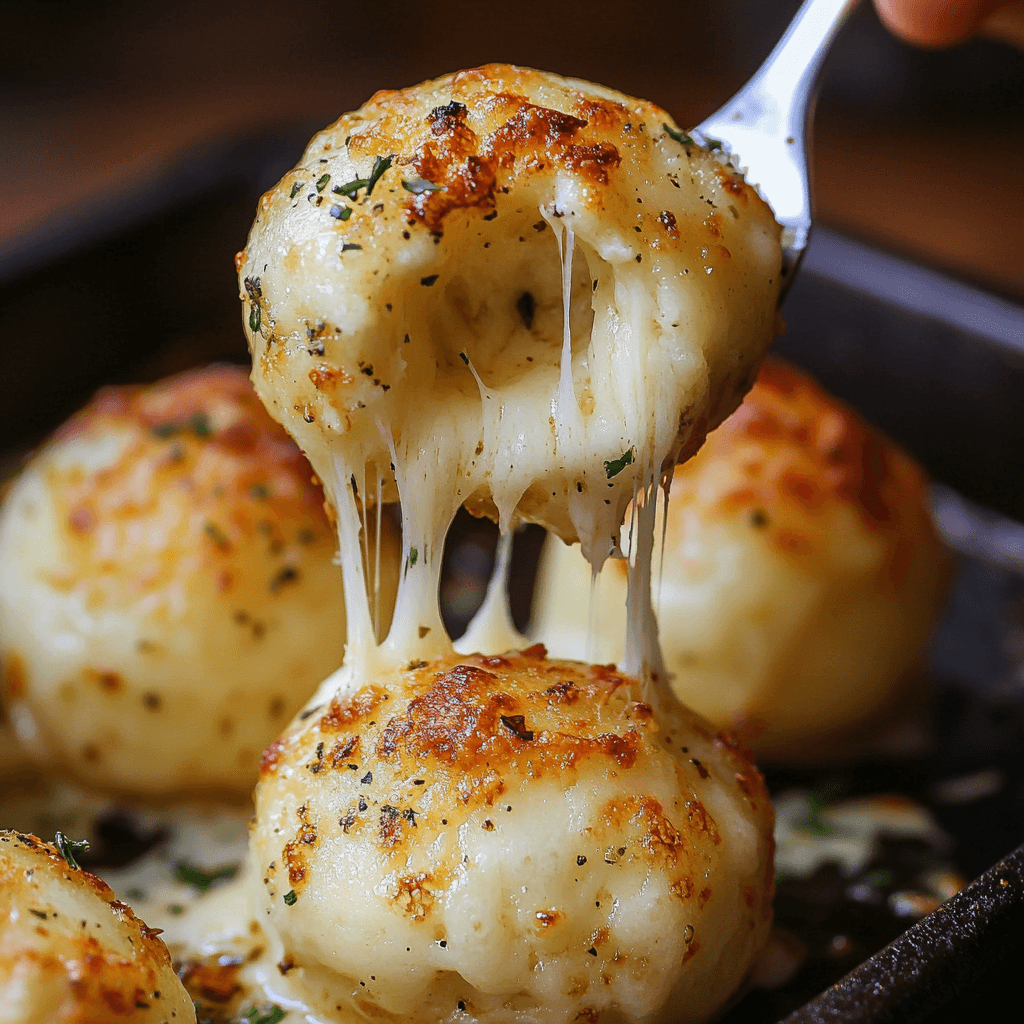
Imagine biting into a crispy golden exterior that suddenly erupts with molten, gooey cheese. These stuffed cheesy bites are not just a snack – they’re a culinary experience. They turn ordinary moments into delectable memories. Cheesy bombs have become the ultimate crowd-pleaser, capturing the hearts of food lovers everywhere.
Whether you’re hosting a game night, preparing a quick appetizer, or simply craving something indulgent, these cheesy bombs promise to elevate your culinary game. The magic lies in their simple yet perfect design. A warm, crispy shell conceals a rich, melting cheese center that stretches with every bite.
Key Takeaways
- Cheesy bombs offer an explosive flavor experience
- Perfect for parties, snacks, and entertaining
- Easy to prepare with minimal ingredients
- Versatile and adaptable to different cheese types
- Guaranteed to impress both kids and adults
What Are Cheesy Bombs and Why They’re Trending
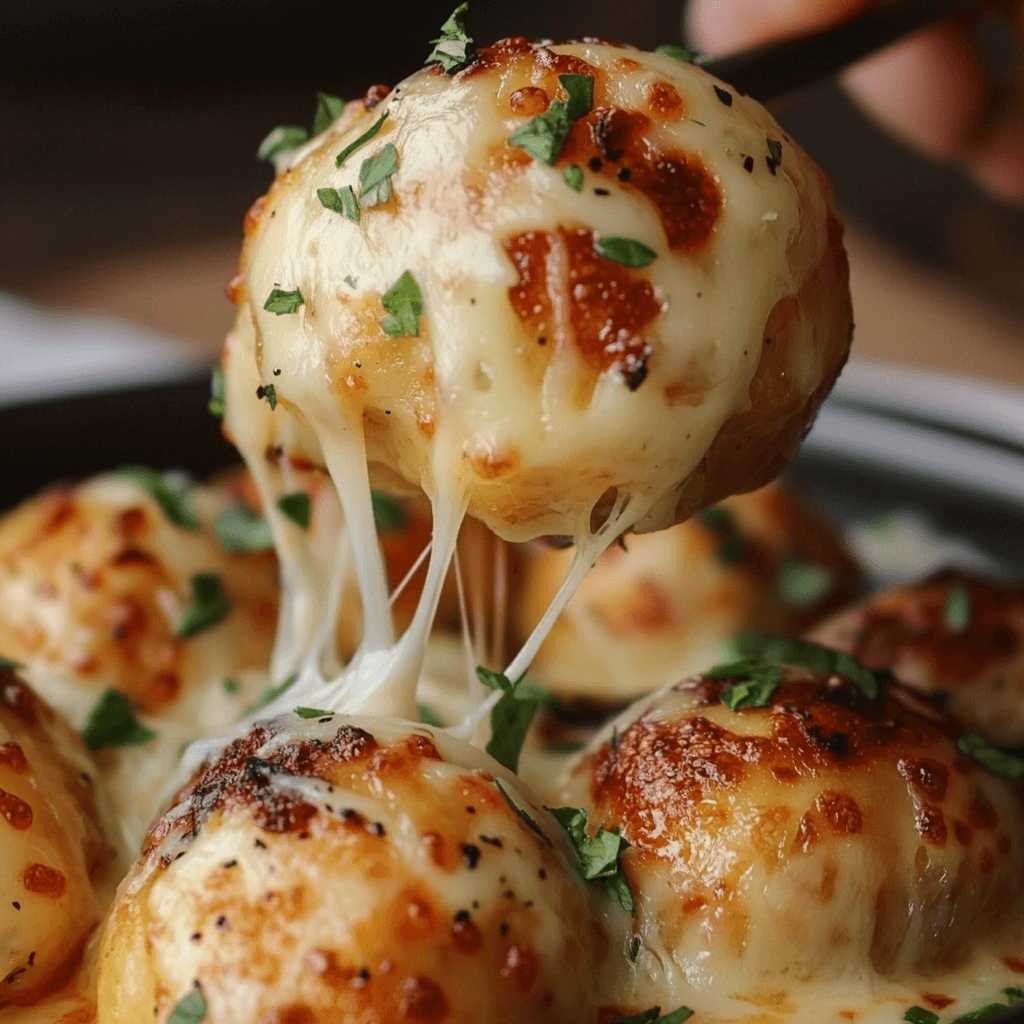
Cheesy bombs have become a hit in the food world. They are cheese-filled bread bites that look great and taste amazing. People love them for their delicious flavors and the fun they are to eat.
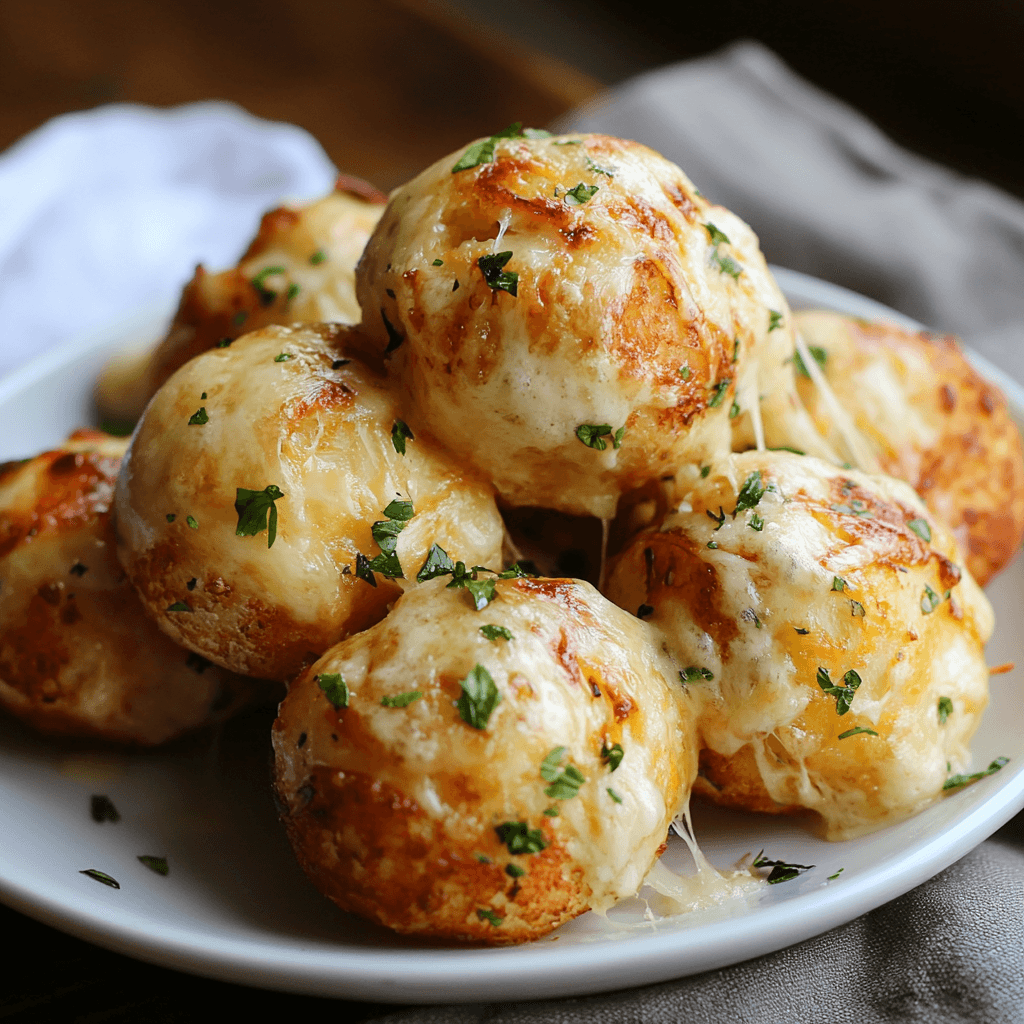
Cheesy Bombs: a mouthwatering array of golden-brown savory bites, oozing with melted cheese. In the foreground, a cluster of the delectable treats, their crisp exteriors giving way to soft, gooey centers. Arranged artfully on a rustic wooden board, garnished with vibrant sprigs of fresh herbs. The middle ground reveals a subtly blurred background, hinting at a cozy, inviting kitchen setting, warm lighting casting a gentle glow. The overall scene conveys a sense of indulgence and homemade comfort, perfectly capturing the appeal of this trending culinary sensation.
Origins of Cheesy Bombs
Cheesy bombs started as a mix of comfort food and cheese-filled pastries. They evolved from simple cheese bread into a trendy dish. Chefs and home cooks experimented with cheeses and bread, making these bites perfect for snacking.
Rising Popularity on Social Media
Social media made cheesy bombs famous. The sight of cheese stretching out is irresistible. Food fans and cooking shows share these treats, getting millions of views and inspiring others to make them.
Why Food Enthusiasts Love Them
- Irresistible cheese pull factor
- Customizable flavor combinations
- Easy to make and share
- Perfect for gatherings and snacking
| Feature | Appeal |
|---|---|
| Texture | Crispy exterior, gooey interior |
| Versatility | Works as appetizer or main dish |
| Flavor Profile | Rich, indulgent, crowd-pleasing |
People love cheesy bombs for their flexibility and comfort. They’re great for parties or a quick snack. These cheese-filled treats are a hit with everyone.
Essential Ingredients for Perfect Cheese Stuffed Bread
A neatly arranged still life on a rustic wooden table, bathed in warm, natural lighting. In the foreground, a variety of cheeses – grated parmesan, sliced cheddar, and crumbled feta – spill out from a ceramic bowl. Beside them, freshly baked bread dough, kneaded and ready to be stuffed with the savory fillings. In the middle ground, a collection of herbs and spices – rosemary, thyme, garlic powder – stand ready to season the dish. The background features a linen cloth, hinting at the homemade and artisanal nature of the scene. The overall mood is one of anticipation, as the ingredients await transformation into a delectable cheese-filled masterpiece.
Starting your cheese stuffed bread journey is exciting. It all begins with the right ingredients. These ingredients turn simple dough into a delicious treat.
High-quality ingredients are key to great cheese stuffed bread. You’ll need three main things:
- Bread Dough: Choose a soft, pillowy base like pizza dough or homemade white bread dough
- Cheese Selection: Pick melting cheeses that create that perfect gooey center
- Flavor Enhancers: Add herbs and spices to elevate your stuffed cheesy bites
For cheese, pick varieties that melt well. Mozzarella, cheddar, and provolone are great for that gooey center. Soft cheeses like cream cheese add richness.
Herbs and spices can change the flavor a lot. Dried oregano, garlic powder, and fresh parsley can make your bread taste like gourmet. Try different mixes to find your favorite.
The quality of your ingredients matters a lot. Using fresh, premium ingredients makes your stuffed cheesy bites taste better. Everyone will love them.
Step-by-Step Guide to Making Cheesy Bombs
Making cheesy bombs at home is simple. These treats are great for parties, snacks, or just to satisfy your cravings. Let’s explore how to make these tasty delights that will wow your guests.
A cozy kitchen counter with a wooden cutting board, freshly grated cheese, diced onions, and a rolling pin. In the foreground, hands carefully assemble the cheesy bombs, pressing the dough around the cheese filling. The bright, natural light filters in through a nearby window, creating a warm, inviting atmosphere. The camera captures the process at a medium angle, showcasing the step-by-step preparation in clean, crisp detail. The scene radiates the comforting scents of homemade baking, enticing the viewer to join in the delicious creation.
First, get all your ingredients ready and set up your workspace. Making perfect cheesy bombs requires patience and careful steps.
Preparing the Dough
Your dough is the base of great cheesy bombs. Here’s how to make it right:
- Use warm water to activate the yeast
- Knead the dough until it’s smooth and elastic
- Let the dough rise in a warm, draft-free area
- Punch down the dough and let it rest for 10 minutes
Cheese Filling Techniques
The secret to amazing cheesy bombs is the filling. Pick your favorite cheese and prepare it well:
- Cut cheese into small, uniform cubes
- Make sure cheese is cold for easier handling
- Wrap dough completely around cheese
- Pinch edges to seal tightly
Baking Tips for Best Results
Getting the perfect cheesy bombs needs some baking know-how:
- Preheat your oven to the right temperature
- Use parchment paper for easy cleanup
- Brush with garlic butter for extra flavor
- Bake until golden brown and cheese is melted
Follow these tips, and you’ll make cheesy bombs that everyone will love! They’ll all want your recipe!
Best Cheese Combinations for Stuffed Cheesy Bites
Choosing the right cheese is key to making perfect stuffed cheesy bites. Your melty cheese bombs will be a hit with the right cheese mix. This mix should offer great flavor and texture.
Start by understanding how cheese melts. Some cheeses melt well and stretch a lot. Others melt smoothly and add deep flavors.
- Mozzarella: Creates signature stretchy pull in melty cheese bombs
- Cheddar: Delivers sharp, tangy flavor profile
- Gruyère: Offers nutty undertones and smooth melting
- Brie: Provides creamy, luxurious texture
Experts say mixing cheeses is a must for a rich taste. By blending cheeses, your bites can go from simple snacks to fancy appetizers.
| Cheese Type | Melting Quality | Flavor Profile |
|---|---|---|
| Mozzarella | Excellent | Mild, Creamy |
| Sharp Cheddar | Good | Tangy, Bold |
| Gouda | Very Good | Rich, Smooth |
Try out different cheese mixes to find your favorite melty cheese bombs. Remember, the cheese’s temperature and how it’s prepared greatly affect your bites.
Mastering the Art of Cheesy Garlic Bread Bombs
Making the perfect cheesy garlic bread bombs is all about precision and passion. These treats are more than just a side dish. They turn simple ingredients into extraordinary bites.
Garlic Butter Preparation
The secret to amazing cheesy garlic bread bombs is exceptional garlic butter. Choose fresh garlic cloves and high-quality unsalted butter. Here’s how to make the ultimate garlic butter:
- Mince fresh garlic finely
- Soften butter at room temperature
- Mix garlic with butter until completely incorporated
- Add a pinch of salt for enhanced flavor
Seasoning Suggestions
Boost your cheesy garlic bread bombs with strategic seasoning. Try these flavor-boosting options:
- Fresh parsley for brightness
- Dried oregano for depth
- Red pepper flakes for subtle heat
- Grated Parmesan for extra cheesiness
Texture Enhancement Tips
Getting the perfect texture is key for loaded cheese bread. You want a crispy outside and a soft, molten inside. Brush your garlic bread bombs with egg wash before baking for a golden finish. Bake at high temperature (around 425°F) for 12-15 minutes for the best crispiness.
Pro tip: Let your cheesy garlic bread bombs rest for 2-3 minutes after baking. This lets the cheese settle and prevents burning your mouth.
Creative Variations of Loaded Cheese Bread
Turn your classic stuffed cheesy bites into something special with these new recipe ideas. Trying out different flavors can make your loaded cheese bread a gourmet treat.
Your loaded cheese bread is a blank canvas for creativity. Begin by mixing in unexpected ingredients that will amaze your taste buds.
- Spicy Southwest Stuffed Cheesy Bites:
- Add diced jalapeños
- Mix in chorizo crumbles
- Sprinkle pepper jack cheese
- Mediterranean-Inspired Loaded Cheese Bread:
- Incorporate sun-dried tomatoes
- Blend feta cheese
- Drizzle with olive oil
- Breakfast-Style Stuffed Cheesy Bites:
- Crumbled bacon pieces
- Scrambled egg filling
- Cheddar cheese blend
Each twist brings a new taste to your loaded cheese bread, making it a fun food journey. Feel free to mix things up and make your own unique recipe.
| Variation Style | Key Ingredients | Flavor Profile |
|---|---|---|
| Spicy Southwest | Chorizo, Jalapeños | Bold, Zesty |
| Mediterranean | Sun-Dried Tomatoes, Feta | Tangy, Herbaceous |
| Breakfast Style | Bacon, Scrambled Eggs | Rich, Comforting |
When making your loaded cheese bread, remember that presentation matters. Add fresh herbs, serve it warm, and watch your guests’ faces light up.
Tips for Achieving the Perfect Cheese Explosion
Making the ultimate cheese explosion bread needs skill and attention to detail. Melty cheese bombs are a treat that requires careful making. Your aim is to make a dish that gives you that amazing gooey, stretchy cheese feeling when you bite into it.
To master melty cheese bombs, you must know a few key things. These factors are what make a cheese explosion truly special.
Temperature Control Secrets
Getting the temperature just right is key for perfect cheese explosion bread. Here’s what to do:
- Preheat your oven to exactly 375°F
- Use an oven thermometer for accuracy
- Position the rack in the middle of the oven
- Avoid opening the oven door frequently during baking
Selecting the Right Cheese
Not all cheeses melt the same way in melty cheese bombs. Pick cheeses that melt well:
- Mozzarella – Classic stretchy texture
- Cheddar – Rich flavor and good meltability
- Gruyère – Smooth, creamy consistency
- Fontina – Exceptional melting characteristics
Avoiding Common Pitfalls
Stay away from these common mistakes to avoid disappointing cheese explosion bread:
- Don’t overstuff your bread with cheese
- Ensure proper sealing of cheese inside the dough
- Grate cheese finely for even melting
- Let the bread rest briefly after baking
By following these tips, you’ll make melty cheese bombs that will wow your guests and satisfy your taste buds.
Serving and Presentation Ideas for Cheesy Pull-Apart Bread
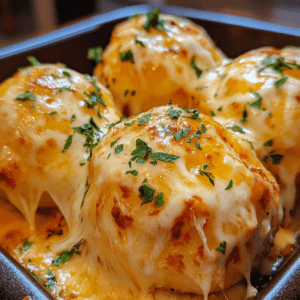
Turn your cheesy bombs into stunning appetizers with creative presentation. Your guests will love the look and taste of your cheesy pull-apart bread. It’s a feast for the eyes as well as the taste buds.
Here are some exciting ways to serve your cheesy bombs:
- Cast-iron skillet presentation for rustic charm
- Wooden cutting boards for elegant serving
- Tiered appetizer stands for party settings
- Individual mini-skillets for personalized servings
Serving temperature is key for cheesy pull-apart bread. Serve your cheesy bombs warm for the best taste. They should be ready to eat within 10-15 minutes of coming out of the oven.
Adding dipping sauces can make your presentation even better:
- Marinara sauce for classic Italian flavors
- Garlic aioli for a creamy twist
- Herb-infused olive oil for elegance
- Spicy ranch for an extra kick
Using garnishes can take your cheesy bombs to the next level. Try fresh herbs like parsley or chives. Or add a sprinkle of parmesan cheese for extra flavor and looks.
Pro tip: Arrange your cheesy bombs in a circle. This makes them easy to share and creates a great centerpiece. Pull-apart bread is perfect for bringing people together.
Storing and Reheating Your Cheese Bombs
Keeping your homemade cheesy bombs delicious means storing and reheating them right. Whether for a party or later, knowing how to do this ensures they taste great.
Storing them properly is key. Here’s how to keep your cheesy bombs fresh and tasty:
- Refrigeration: Store cheesy bombs in an airtight container
- Separate layers with parchment paper to prevent sticking
- Consume within 3-4 days for optimal taste
- Freeze for long-term storage up to 2 months
Refrigeration Tips
When you store your cheesy bombs in the fridge, wrap them well to keep moisture in. Use plastic wrap or aluminum foil for best results. Put them in a container with a tight lid to keep their texture and avoid bad smells.
Reheating Techniques
Bring back the crispy outside and gooey inside of your cheesy bombs with these methods:
- Oven Method: Preheat to 350°F, place on a baking sheet, heat for 8-10 minutes
- Air Fryer: Heat at 350°F for 3-4 minutes until crispy
- Microwave: Use sparingly to avoid soggy texture, heat for 20-30 seconds
Pro tip: Don’t reheat your cheesy bombs too many times. It can make them lose their texture and taste. Always reheat only what you’ll eat right away.
Pairing Suggestions for Your Melty Cheese Bombs
Your melty cheese bombs need the perfect match to bring out their amazing taste. The right pairing can turn these cheesy bread bombs into a gourmet treat. It will make your taste buds happy.
Wine lovers have many great choices to go with these cheesy treats. For lighter cheese bombs, try a crisp white wine like Sauvignon Blanc. If you prefer red wine, a medium-bodied Pinot Noir works well with the cheese’s richness.
Best Beverage Pairings
- Craft Beer: IPA or amber ale
- White Wine: Chardonnay or Sauvignon Blanc
- Red Wine: Pinot Noir or Beaujolais
- Non-Alcoholic: Sparkling apple cider
Think about dishes that go well with your cheesy garlic bread bombs. A light salad with tangy dressing is a great contrast to the cheese. Grilled veggies or a simple tomato bruschetta also make a good pair.
Perfect Side Dishes
- Mixed green salad
- Roasted vegetable platter
- Marinara dipping sauce
- Herb-infused olive oil
Pro tip: Serve your melty cheese bombs warm for the best cheese pull. This ensures your guests get the full flavor. Try different pairings to find your favorite!
Troubleshooting Common Issues When Making Cheesy Bombs
Making the perfect cheese stuffed bread can be tricky. Even experienced bakers face challenges. But, most problems have simple fixes to help you make great cheesy bombs.
Let’s look at some common issues you might run into:
- Dough Not Rising Properly
- Check yeast freshness
- Ensure warm (not hot) liquid temperature
- Provide a draft-free environment for rising
- Cheese Leakage During Baking
- Seal edges completely
- Use cold, firm cheese
- Avoid overfilling cheese stuffed bread
- Dense or Dry Texture
- Don’t overwork the dough
- Measure ingredients precisely
- Avoid overbaking loaded cheese bread
Understanding the science behind these issues can improve your baking. Yeast needs the right conditions, cheese needs sealing, and dough needs gentle handling.
| Problem | Possible Cause | Quick Fix |
|---|---|---|
| Flat Cheesy Bombs | Inactive Yeast | Replace and proof new yeast |
| Cheese Explosion | Improper Sealing | Pinch edges thoroughly |
| Tough Dough | Excessive Kneading | Mix until just combined |
Practice makes perfect in baking delicious cheese stuffed bread. Each try brings you closer to making amazing loaded cheese bread. It will impress everyone.
Conclusion
Cheesy bombs have changed how we see snacks and appetizers. These tasty bites mix a crispy outside with a gooey cheese inside. They win over food lovers’ hearts.
Whether you’re new to cooking or a pro, making cheesy bombs can boost your skills. They impress everyone at parties.
Creating perfect cheesy bombs is just the start. You can try different cheeses, seasonings, and ways to make them. Be creative and don’t be scared to mix new flavors.
Remember, it takes practice to get it right. Your first batch might not look perfect, but each try gets you closer to being a cheesy bomb master.
We want you to share your cheesy bomb creations with us. Post your photos, share tips, and inspire others. Your special cheesy bomb recipe could go viral. Start exploring, keep trying new things, and most importantly, enjoy making and eating cheesy bombs!
FAQ
What exactly are cheesy bombs?
Cheesy bombs are tasty little bread pieces filled with melted cheese. They have a crispy outside and a gooey inside. You can make them into appetizers or snacks, and add different cheeses and spices for extra flavor.
How difficult are cheesy bombs to make at home?
Making cheesy bombs at home is pretty simple. You just need the right ingredients and a bit of baking know-how. Follow some basic steps to get that perfect cheesy center.
What types of cheese work best for cheesy bombs?
Mozzarella is great because it stretches well. Cheddar adds a sharp taste. Soft cheeses like brie or camembert are creamy. Try mixing cheeses for unique flavors.
Can cheesy bombs be made ahead of time?
Yes, you can make them ahead. They can chill in the fridge or even freeze. Just bake them fresh for the best taste and texture.
Are there vegetarian options for cheesy bombs?
Definitely! Cheesy bombs are already vegetarian. You can add herbs, roasted veggies, or different cheeses for meat-free options.
How do I prevent cheese from leaking out during baking?
Seal the dough well around the cheese. Use room temperature cheese and don’t overstuff. Chilling the bombs before baking helps keep them in shape.
What are some creative variations of cheesy bombs?
Try garlic cheese bombs, pizza-style ones with marinara, or sweet ones with dessert cheese. Mix herbs and spices for new tastes.
How should I serve cheesy bombs?
Serve them warm as appetizers or snacks. Use a wooden board or cast-iron skillet. Add marinara, ranch, or garlic aioli for dipping to make it more special.
Quick and Simple Cheesy Bombs Recipe for Cheese Lovers
Ingredients
- 1 can 16 oz biscuit dough (refrigerated)
- 1 1/2 cups shredded mozzarella cheese
- 1/4 cup Parmesan cheese
- 1/2 teaspoon garlic powder
- 1/2 teaspoon dried oregano
- 2 tablespoons butter melted
- 1/2 teaspoon garlic salt
- Fresh parsley optional, for garnish
Instructions
- Step 1: Preheat and Prepare
- Preheat oven to 375°F (190°C).
- Lightly grease a baking sheet or line with parchment paper.
- Step 2: Make the Cheese Filling
- In a bowl, combine mozzarella cheese, Parmesan cheese, garlic powder, and oregano.
- Step 3: Assemble the Bombs
- Open the biscuit dough and separate it into individual biscuits.
- Flatten each biscuit into a small circle using your fingers.
- Place a generous spoonful of the cheese mixture in the center of each biscuit.
- Fold the edges of the dough over the cheese, pinching it to seal the edges. Form a ball.
- Step 4: Bake the Cheesy Bombs
- Place the cheese-filled balls on the prepared baking sheet.
- Brush the tops with melted butter and sprinkle with garlic salt.
- Bake for 12-15 minutes, or until golden brown and the cheese is melted inside.
- Step 5: Serve
- Remove from oven and let cool slightly.
- Optionally, garnish with fresh parsley. Serve warm and enjoy!
Notes
✔️ Try different cheeses, like cheddar or pepper jack, for a unique twist!
✔️ Make ahead—assemble and refrigerate for up to 1 hour before baking.