
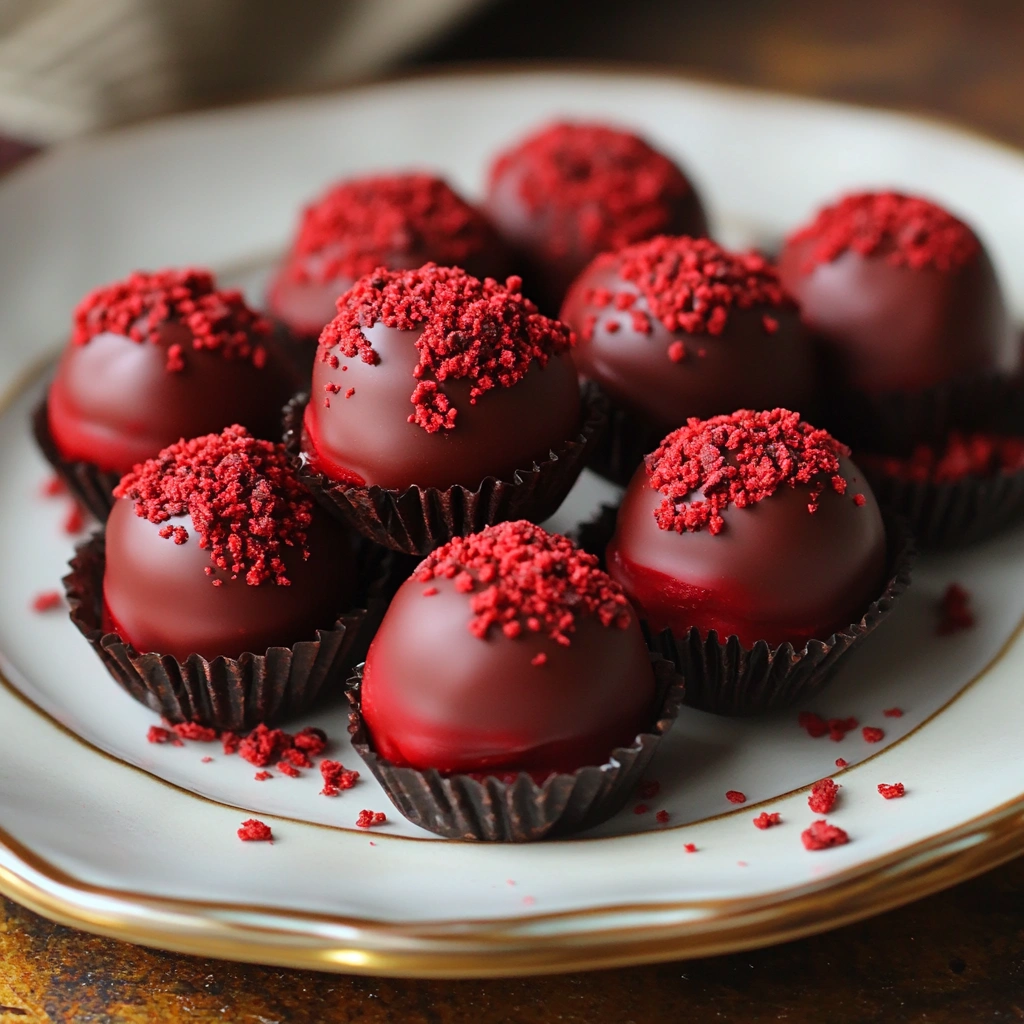
Each bite of a red velvet truffle tells a tale of pure indulgence. I first found these treats at a small bakery in downtown Chicago. The rich crimson color and velvety texture won my heart. Red velvet truffles are more than desserts; they’re moments of joy that make any gathering special.
These treats are more than just desserts they’re a culinary tradition, blending rich chocolate with a velvety smooth texture. Whether you’re new to baking or experienced, making these truffles is surprisingly easy.
Imagine wowing your friends and family with homemade truffles that look like they’re from a pro. With simple ingredients and a few tricks, you can make these treats. They’re perfect for birthdays, holidays, or just when you need a sweet fix.
Key Takeaways
- Red velvet truffles offer a luxurious dessert experience
- Preparation is simpler than most people expect
- Perfect for special occasions and gift-giving
- Combines rich chocolate flavor with elegant presentation
- Adaptable recipe for various skill levels
- Creates memorable culinary moments
Understanding Red Velvet Truffles
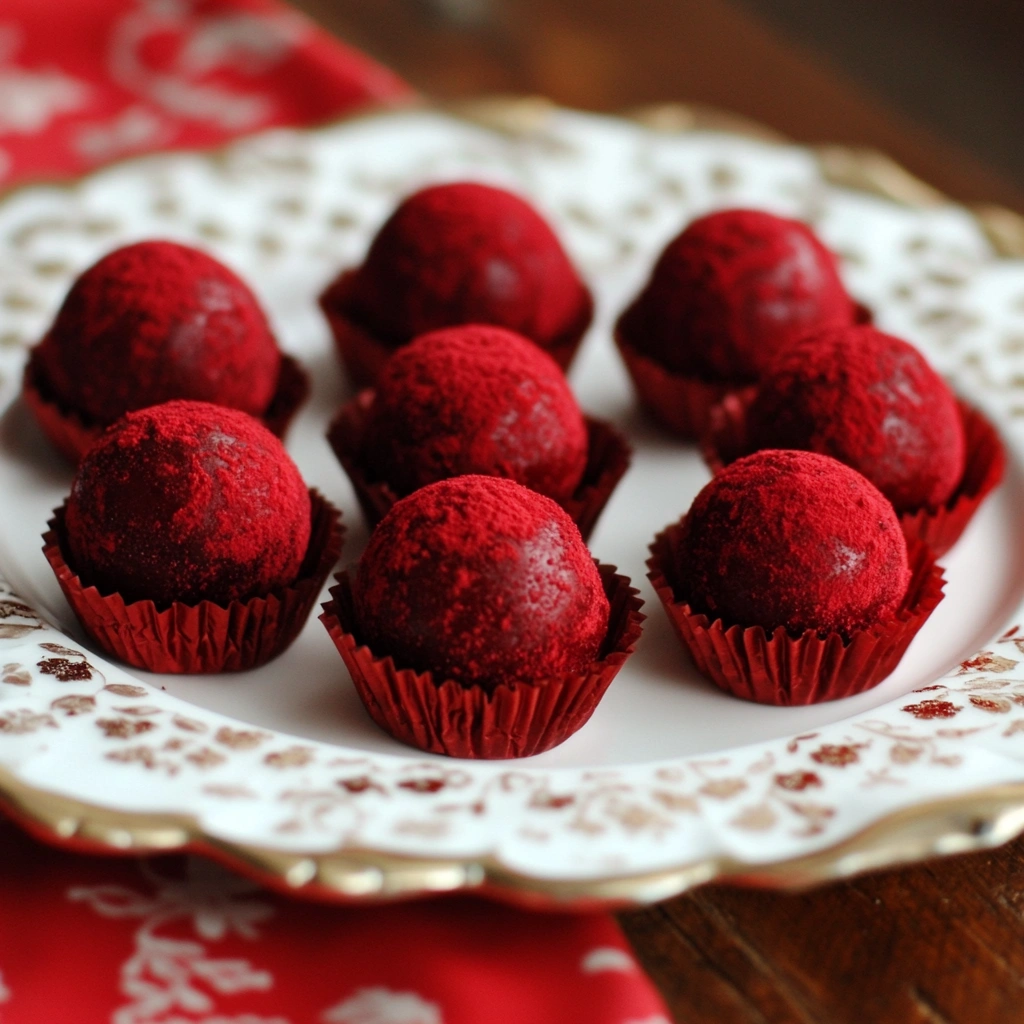
Red velvet truffles are a mix of rich chocolate and vibrant art. They turn a favorite cake into small, tasty treats. These truffles are a genuine treat for your taste buds.
A close-up of decadent red velvet truffles, showcasing their rich crimson color and velvety texture, surrounded by a sprinkle of cocoa powder, white chocolate shavings, and vibrant garnishes like raspberries and mint leaves. Soft lighting highlights the glossy chocolate coating and the enticing inner cream cheese filling, evoking a sense of indulgence and luxury.
Traditional Red Velvet Flavor Profile
The classic red velvet taste has a few key parts:
- Subtle cocoa powder undertones
- Creamy cream cheese hints
- Vibrant red food coloring for visual appeal
- Delicate sweetness balanced with tangy notes
History and Evolution
Red velvet desserts started in the early 1900s. Southern bakeries made them famous. The red color came from cocoa powder and buttermilk, creating a unique look.
Modern Interpretations
Today, bakers make red velvet into many things. They create truffle balls and cake pops. Chefs try new things like:
- Unique coating techniques
- Innovative flavor combinations
- Gourmet ingredient selections
- Artistic presentation styles
Red velvet truffles are a fun adventure for anyone who loves desserts.
Essential Ingredients for Perfect Red Velvet Truffles
A beautifully arranged flat lay of red velvet truffles ingredients, featuring a rich red cocoa powder, creamy white chocolate, a bowl of smooth cream cheese frosting, a measuring cup of flour, rich butter, granulated sugar, and a sprinkle of cocoa nibs, all set against a rustic wooden background with some elegant kitchen utensils around.
Making delicious red velvet truffles starts with picking the right ingredients. Your journey to rich flavors begins with understanding the key components. These elements transform simple ingredients into an extraordinary dessert.
The foundation of these irresistible truffles lies in carefully chosen ingredients. They come together to craft a magical culinary experience. Cream cheese is key, delivering the signature smooth texture and tangy undertone that makes red velvet so distinctive.
Core Ingredients
- All-purpose flour
- Granulated sugar
- High-quality cocoa powder
- Red food coloring
- Cream cheese
Flavor Enhancers
- Pure vanilla extract
- Buttermilk
- Unsalted butter
Your cream cheese selection matters a lot. Choose a full-fat, room temperature cream cheese for a smooth, rich texture. The cocoa powder should be unsweetened and of premium quality. This ensures deep, complex rich flavors.
| Ingredient | Quantity | Purpose |
|---|---|---|
| Cream Cheese | 8 oz | Provides creamy texture |
| Cocoa Powder | 2 tbsp | Delivers chocolate depth |
| Red Food Coloring | 1-2 tbsp | Creates signature color |
Pro tip: Always measure ingredients precisely and use fresh, high-quality components. This ensures the most delicious red velvet truffles. They will impress everyone at your gathering.
Kitchen Tools and Equipment Needed
Making tasty homemade candies like red velvet truffles needs the right tools. Having the right utensils makes it easier. Let’s look at the essential tools for these sweet treats.
Essential Mixing Tools
To make your candies, you’ll need some key tools:
- Large mixing bowls in various sizes
- Electric hand mixer or stand mixer
- Rubber spatulas for scraping bowls
- Whisk for blending ingredients
- Measuring cups and spoons
Baking Equipment
Your baking tools are key for perfect candies:
- Baking sheets with non-stick surface
- Parchment paper or silicone baking mats
- Cooling rack for finished truffles
- Cake pan (9×13 inches recommended)
- Oven mitts for safety
Decorating Supplies
Use these tools to decorate your candies:
- Piping bags
- Chocolate melting tools
- Dipping forks
- Decorative sprinkles
- Candy coating melting wafers
Pro tip: You don’t need the most expensive tools to make great truffles. Creativity and passion are more important than expensive equipment!
| Tool Category | Recommended Items | Average Cost Range |
|---|---|---|
| Mixing Tools | Stand Mixer | $100-$300 |
| Baking Equipment | Non-Stick Baking Sheet | $15-$40 |
| Decorating Supplies | Chocolate Melting Pot | $25-$75 |
Step-by-Step Preparation Process
Making red velvet dessert balls is all about precision and patience. You’ll turn a classic red velvet cake into small treats. These will impress your guests and satisfy your sweet tooth.
- Cake Base Preparation
- Bake a standard red velvet cake at 350°F
- Cool completely for 10 minutes in pan
- Allow cake to reach room temperature
- Cake Crumbling Technique
- Crumble cake into fine, even pieces
- Ensure no large cake chunks remain
- Use clean hands or fork for consistent texture
- Mixing Filling
- Add 8 oz cream cheese
- Mix until smooth consistency
- Create uniform dessert balls mixture
- Shaping Dessert Balls
- Roll mixture into 1-1/2 inch diameter balls
- Place on parchment-lined baking sheet
- Refrigerate for 1 hour to firm
- Chocolate Coating
- Melt dark chocolate
- Dip chilled dessert balls
- Allow excess chocolate to drip
- Place on cooling rack
Your red velvet dessert balls are now ready to chill and serve. With practice, you’ll master the art of making these delicious treats. They’re a mix of rich flavor and elegant look.
Tips for Making the Perfect Cake Base
Making the perfect cake base is key for tasty valentine’s day treats like red velvet truffles. You need to master a few important techniques. These will turn an ordinary cake into a special truffle treat.
Moisture Control Techniques
It’s vital to control moisture for the best valentine’s day treats. Your cake should be moist but not soggy. Here are some tips:
- Measure buttermilk precisely (1/2 cup)
- Add 1 teaspoon of white vinegar for tenderness
- Avoid overmixing batter to prevent dense texture
Texture Considerations
Getting the right texture is all about balancing ingredients. For treats that wow, pay attention to:
- Use all-purpose flour (2¼ cups) for structure
- Incorporate 2 tablespoons cornstarch for softness
- Mix dry ingredients thoroughly before combining
Cooling Techniques
Cooling right helps keep moisture in and makes truffles easier to make. After baking at 350°F for 28-30 minutes, do this:
- Take the cake out of the oven and let it rest for 10 minutes
- Transfer to a wire rack for complete cooling
- Refrigerate for 1-2 hours before crumbling
Remember, the secret to amazing valentine’s day treats is patience and precision in making the cake base.
Coating and Decoration Techniques
Making stunning chocolate truffles is more than just mixing ingredients. Your red velvet truffles need beautiful coatings to look amazing. The right decoration can make these treats unforgettable.
There are many ways to coat your chocolate truffles for a perfect look. Here are some top methods to make your truffles look stunning:
- Classic Chocolate Coating
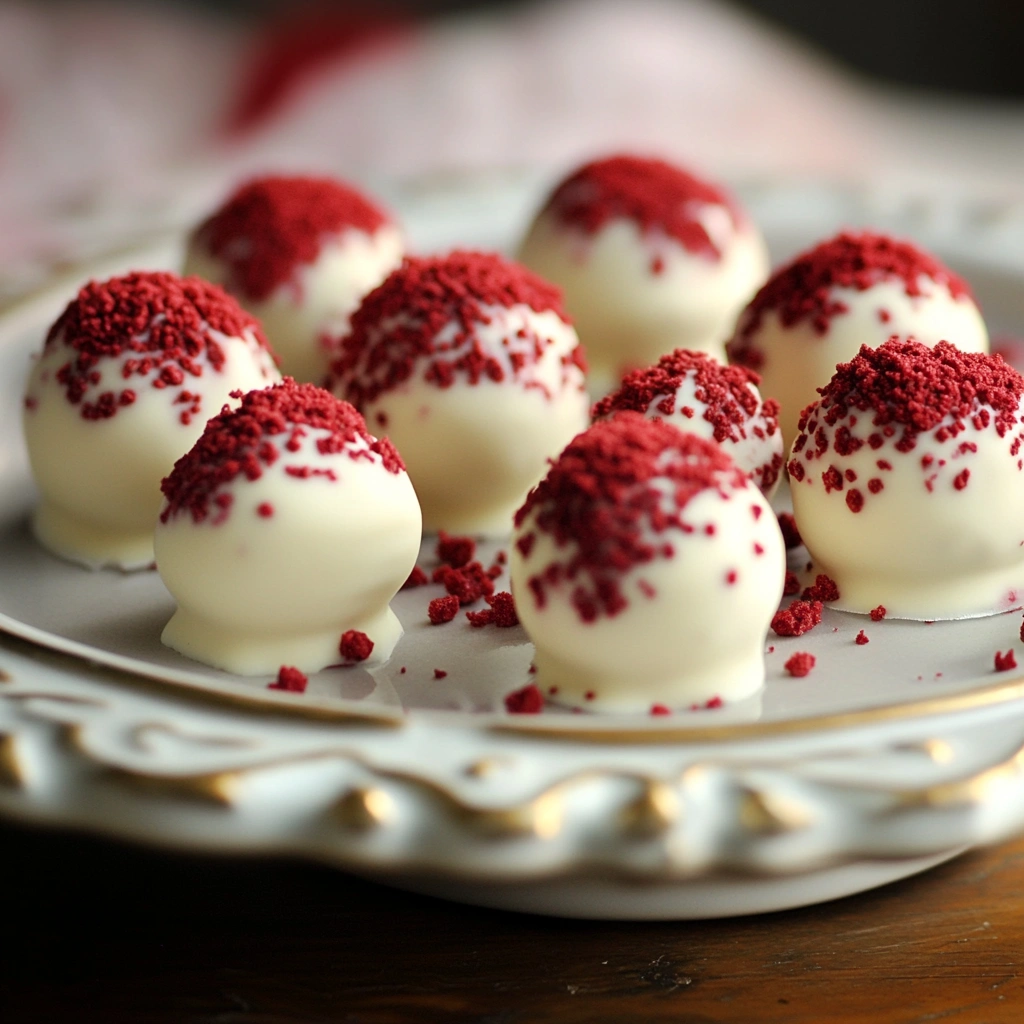
- Use pure white or dark chocolate
- Ensure chocolate is melted to smooth consistency
- Dip truffles using a fork for even coverage
- Decorative Options
- Sprinkle edible glitter
- Add colored candy melts
- Drizzle contrasting chocolate
When working with chocolate truffles, precision is crucial. Keep your chocolate at 86-90°F for the best coating. This temperature gives your truffles a glossy, professional look.
| Coating Type | Preparation Time | Visual Appeal |
|---|---|---|
| White Chocolate | 15 minutes | Elegant, smooth finish |
| Dark Chocolate | 15 minutes | Rich, sophisticated look |
| Candy Melts | 10 minutes | Colorful, playful appearance |
For professional-looking chocolate truffles, chill your truffle balls for 30-60 minutes before coating. This makes the chocolate stick better and looks more polished. Experiment with various techniques to discover your own unique style!
Pro tip: Use a chocolate dipping tool or fork for even coating and less mess. Let excess chocolate drip off before placing truffles on parchment paper to set.
Storage and Shelf Life Guidelines
Keeping your homemade candies fresh is key. Knowing how to store your red velvet truffles right is important. It helps keep their amazing taste and texture for longer.
Refrigeration Methods for Homemade Candies
Red velvet truffles need special care in the fridge. Store them in an airtight container to avoid moisture and keep flavors pure. Keep the fridge at 40°F (4°C) or lower for the best storage.
- Use sealed plastic containers with tight-fitting lids
- Place a sheet of parchment paper between truffle layers to prevent them from sticking
- Keep truffles away from strong-smelling foods
Freezing Instructions for Extended Storage
Freezing is great for keeping your candies fresh for months. Red velvet truffles can stay good in the freezer for up to three months.
- Wrap individual truffles in wax paper
- Place wrapped truffles in a freezer-safe container
- Label container with freezing date
Thawing Procedures
Thawing your candies right is important. Move frozen truffles to the fridge and let them thaw slowly over hours.
Pro tip: Enjoy refrigerated truffles within two weeks for the best taste. Always check for spoilage before eating.
Creative Variations and Flavor Combinations
Turn your red velvet truffles into gourmet treats by trying new flavors. The classic red velvet recipe is a great base for creativity. It lets you mix rich flavors that will excite your taste buds.
Here are some exciting flavor combinations to make your truffles stand out:
- Espresso Infusion: Add a shot of espresso powder to deepen the chocolate flavor
- Citrus Twist: Add orange zest or lemon extract for a zesty, refreshing taste
- Liqueur Enhancement: Mix in a bit of raspberry or coffee liqueur for a grown-up twist
Try unique fillings to make your truffles truly special:
| Filling Type | Flavor Profile | Recommended Pairing |
|---|---|---|
| Cream Cheese | Tangy and Smooth | Fruit Preserves |
| Dark Chocolate | Intense and Rich | Salted Caramel |
| White Chocolate | Sweet and Creamy | Raspberry Compote |
Get creative with coatings too. Roll your truffles in crushed nuts, edible glitter, or gold leaf. This ensures they look as amazing as they taste.
Serving Suggestions and Presentation Ideas
Make your red velvet truffles stand out with creative presentation. They can turn any event into a special moment. The right way to serve and display them is key.
When it comes to showing off these treats, presentation matters a lot. Here are some elegant ways to serve them:
- Create a romantic dessert platter with heart-shaped arrangements
- Use vintage cake stands for dramatic height
- Incorporate edible decorations like gold leaf or delicate sugar flowers
For a unique experience, pair your red velvet truffles with drinks:
| Beverage | Pairing Notes |
|---|---|
| Champagne | Enhances romantic atmosphere |
| Espresso | Balances sweet truffle flavor |
| Port Wine | Rich complement to chocolate |
When giving these treats as gifts, choose cute containers. Clear gift boxes with satin ribbons make them look fancy and thoughtful.
Don’t forget to chill your truffles before serving. With great presentation, they become more than just dessert. They become a memorable treat.
Conclusion
Making red velvet truffles is more than a fun cooking project. It’s a chance to create treats that make everyone happy. Your homemade truffles mix rich taste with beautiful looks, turning a simple dessert into something special.
Red velvet truffles let you be creative in many ways. They’re perfect for any event or just for a sweet treat. Their bright red color and deep flavor make them a hit with anyone who tries them.
Learning to make red velvet truffles is all about trying new things and enjoying the journey. Start with a basic recipe and then add your own twist. With each batch, you’ll get better at making desserts that look and taste great.
Your adventure with red velvet truffles is just starting. Don’t be afraid to try new things, share your creations, and enjoy every bite of your culinary journey.
Free Body Calculator – Know Your Body
Wondering if your body is in a healthy range? Use our Free Body Calculator to find out if you’re fit, normal, or need a lifestyle change. Get personalized tips, calorie targets, and your ideal protein, carbs, and fat intake – all in seconds.
Try Free Body Calculator Now
No-Bake Red Velvet Truffles – A Simple Dessert Idea
Ingredients
- For the Truffles:
- 1 box red velvet cake mix plus ingredients needed for baking
- 1/2 cup cream cheese frosting store-bought or homemade
- For the Coating:
- 12 oz white chocolate or milk chocolate chips or candy melts
- 1 tbsp vegetable oil or coconut oil optional, for thinning chocolate
- For Garnish optional:
- Sprinkles
- Crushed cookies like Oreos
- Drizzle of contrasting chocolate

Instructions
- Bake the Cake:
- Prepare and bake the red velvet cake according to the package instructions. Allow it to cool completely.
- Make the Truffle Mixture:
- Crumble the cooled cake into a large bowl until it resembles fine crumbs.
- Add the cream cheese frosting and mix until the mixture holds together like dough. Start with 1/4 cup frosting and add more as needed.
- Form the Truffles:
- Roll the mixture into 1-inch balls and place them on a baking sheet lined with parchment paper.
- Chill in the refrigerator for at least 1 hour or in the freezer for 20-30 minutes to firm up.
- Coat the Truffles:
- Melt the chocolate chips in a microwave-safe bowl in 20-second increments, stirring between each until smooth. Add vegetable oil if the chocolate needs to be thinned.
- Dip each chilled truffle into the melted chocolate, ensuring it’s fully coated. Use a fork to lift the truffle, letting the excess chocolate drip off. Place back on the parchment paper.
- Decorate:
- While the chocolate is still wet, sprinkle with decorations like sprinkles or crushed cookies.
- Alternatively, let the coating set and drizzle with contrasting chocolate for a decorative touch.
- Set and Serve:
- Let the truffles set at room temperature or in the fridge until the coating is firm. Serve chilled or at room temperature.
Notes
- Make Ahead: These truffles can be made up to 5 days in advance and stored in an airtight container in the fridge.
- Freezing Option: Freeze uncoated truffles for up to 3 months. Coat in chocolate after thawing.
- Homemade Frosting: To make your own frosting, mix 4 oz cream cheese with 1/2 cup powdered sugar and 1/2 tsp vanilla extract.
- Flavor Variations: Add a splash of almond or peppermint extract to the melted chocolate for a festive twist.
1 thought on “How to Make Red Velvet Truffles with Cream Cheese Filling”
Comments are closed.