
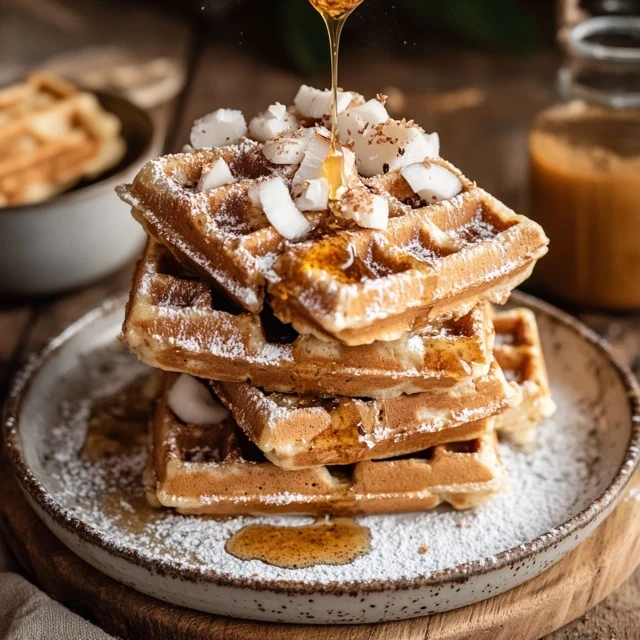
Wake up to a breakfast revolution that changes your morning. Coconut flour waffles are more than just a health trend. They’re a tasty change for healthier breakfasts. These waffles are light, crispy, and different from usual wheat-based ones.
Struggling with gluten sensitivities? Or looking for healthier cooking options? Coconut flour waffles are here for you. They taste amazing and offer health benefits that regular waffles can’t.
Imagine a waffle that’s delicious and supports your health goals. These waffles are full of nutrients, low in carbs, and easy to make. They’re great for keto, paleo, or gluten-free diets. Coconut flour waffles are a tasty solution that keeps your diet interesting.
Key Takeaways
- Coconut flour waffles provide a nutritious breakfast alternative
- Perfect for gluten-free and low-carb diets
- Offers superior nutritional profile compared to traditional waffles
- Easy to prepare with simple ingredients
- Supports various dietary needs without sacrificing flavor
Benefits of Using Coconut Flour in Waffle Recipes
Coconut flour has changed the game for gluten-free waffles. It’s a healthy and tasty option compared to traditional wheat-based recipes. This ingredient is a big hit in kitchens focused on health.
Nutritional Advantages of Coconut Flour
Coconut flour is packed with nutrients. It’s a superfood that offers a lot:
- High in dietary fiber (up to 5 grams per 2 tablespoons)
- Rich in protein compared to traditional flour
- Low in carbohydrates, supporting weight management
- Contains healthy medium-chain triglycerides (MCTs)
Dietary Restrictions and Coconut Flour
Gluten-free waffles are now easier to make. Coconut flour fits many dietary needs. It’s great for:
- Celiac disease patients
- Paleo diet followers
- Low-carb lifestyle enthusiasts
- Individuals with wheat allergies
Texture and Taste Benefits
Coconut flour makes low-carb waffles a treat. It gives them a light, crispy outside and a soft inside. The nutty flavor adds a special touch to your breakfast.
| Flour Type | Carbs per 1/4 Cup | Fiber Content | Protein |
|---|---|---|---|
| Coconut Flour | 16g | 10g | 4g |
| All-Purpose Flour | 24g | 1g | 3g |
Using coconut flour in your waffle recipes is a smart choice. It’s healthy and doesn’t sacrifice taste or texture.
Essential Ingredients for Perfect Coconut Flour Waffles
Making tasty grain-free waffles begins with picking the right ingredients. Coconut flour waffles need a special mix to get the taste and texture just right.
Coconut flour is the main ingredient in these gluten-free waffles. It’s very absorbent, so you need to use it carefully to get the right consistency.
- High-quality coconut flour (finely ground and fresh)
- Large eggs (critical for binding)
- Liquid components like almond milk or coconut milk
- Baking powder (for leavening)
- Healthy fats like melted butter or coconut oil
When picking ingredients for your grain-free waffles, aim for quality and balance. Eggs are key for structure and moisture. They help make the waffles light and fluffy, just like regular waffles.
Sweetener choices can range from natural options like stevia or monk fruit to a bit of honey. The goal is to find a sweetener that enhances the coconut flour’s nutty taste without overpowering it.
Pro tip: Always sift your coconut flour to avoid clumps. This simple step can greatly improve your waffle’s texture.
Step-by-Step Guide to Making Coconut Flour Waffles
Making coconut flour waffles needs care and precision. They’re great for a healthy breakfast instead of regular waffles. Follow this guide to make delicious coconut flour waffles that everyone will love.
Mixing the Dry Ingredients
First, collect your dry ingredients. You’ll need:
- 1/2 cup coconut flour
- 1 teaspoon baking powder
- 1/4 teaspoon salt
- 1 teaspoon cinnamon (optional)
Sift these ingredients to avoid lumps. Proper mixing ensures an even distribution of coconut flour, which is crucial for achieving a smooth waffle texture.
Combining Wet Ingredients
For successful breakfast recipes using coconut flour, wet ingredients require careful blending:
- 4 large eggs
- 1/4 cup melted coconut oil
- 1/4 cup almond milk
- 1 teaspoon vanilla extract
Whisk these ingredients until fully incorporated. The goal is to create a smooth batter for light and crispy waffles.
Proper Waffle Iron Temperature
Getting the perfect golden-brown waffle depends on temperature. Preheat your waffle iron to medium-high heat, around 375-400°F. This ensures a crispy exterior while maintaining a soft interior.
| Temperature Range | Waffle Texture | Cooking Time |
|---|---|---|
| 350-375°F | Soft, less crispy | 3-4 minutes |
| 375-400°F | Crispy, golden-brown | 4-5 minutes |
| 400-425°F | Very crispy, potential burning | 2-3 minutes |
Pour your batter into the preheated waffle iron, using about 1/2 cup per waffle. Close the lid and cook until the indicator light suggests they’re done or the waffles are golden brown.
Tips for Achieving Light and Crispy Keto Waffles
Creating the perfect low-carb waffles can change your keto breakfast game. The secret to light and crispy keto waffles is in a few key techniques. These techniques turn your coconut flour batter into a delightful morning treat.
Mastering the right ingredients is key for successful low-carb waffles. Here are some expert tips to make your keto waffles better:
- Use xanthan gum to improve texture and binding
- Separate egg whites and whip them for extra fluffiness
- Ensure your waffle iron is properly preheated
- Avoid overmixing the batter to prevent dense waffles
The consistency of your keto waffles depends on the right ingredient balance. Coconut flour absorbs moisture differently than traditional flour. You’ll need to adjust the liquid ratios.
A thicker batter usually gives you crispier edges. A slightly thinner mix makes your waffles more tender.
Temperature control is crucial when making low-carb waffles. Preheat your waffle iron to medium-high heat. Use a light coating of coconut oil or butter to prevent sticking.
This helps create that golden, crispy exterior that makes keto waffles irresistible.
Pro tip: Let your waffles rest for 30-60 seconds after cooking. This short cooling time allows the exterior to set and become wonderfully crunchy. Your keto waffles will be a delicious alternative to traditional high-carb versions.
Common Mistakes to Avoid When Making Gluten-Free Waffles
Making gluten-free waffles can be tricky, especially with coconut flour. Knowing the common mistakes helps you make tasty paleo waffles that are good for you.
When making gluten-free waffles, several mistakes can ruin your recipe. Knowing these issues helps you make waffles as good as those in restaurants.
Batter Consistency Challenges
Coconut flour soaks up liquid differently than regular flour. This makes getting the right batter consistency key for gluten-free waffles. Watch out for these problems:
- Overly thick batter that won’t spread in the waffle iron
- Runny batter that creates thin, crispy waffles
- Uneven mixing leading to lumpy texture
Temperature Control Difficulties
Paleo waffles need the right temperature. Wrong heat can cause:
- Undercooked centers
- Burnt exterior
- Soggy and dense waffle texture
Storage and Preservation Errors
Storing waffles right is key to keeping them fresh. Avoid these mistakes:
- Storing warm waffles in sealed containers
- Refrigerating without proper protection
- Failing to separate layers when freezing
Pro tip: Always let waffles cool completely before storing to prevent moisture buildup and maintain crisp texture.
Delicious Toppings and Serving Suggestions
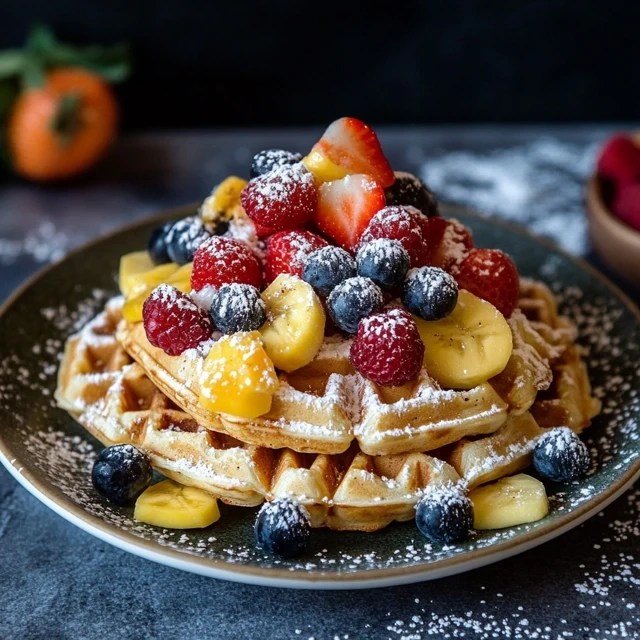
Make your breakfast special with creative toppings. These toppings turn your coconut flour waffles into something amazing. They offer a chance to mix flavors that please both sweet and savory tastes.
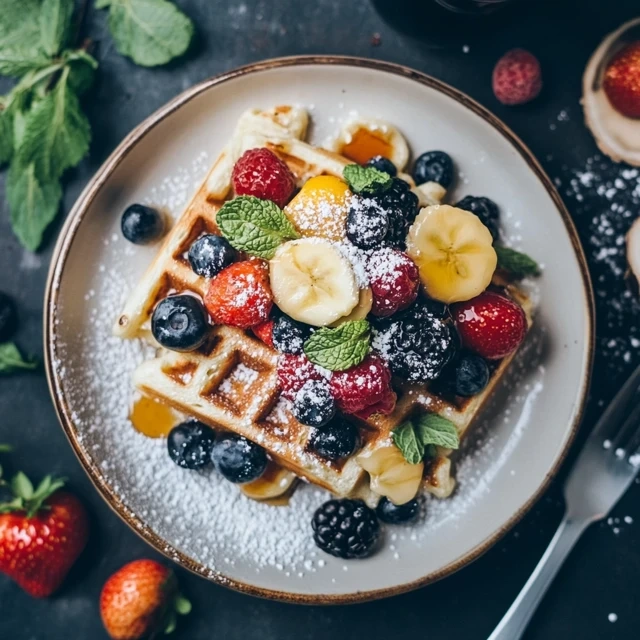
Sweet Topping Options
- Fresh berries (strawberries, blueberries, raspberries)
- Sugar-free maple syrup
- Almond or cashew butter
- Keto-friendly chocolate drizzle
- Whipped coconut cream
Savory Serving Ideas
- Scrambled eggs
- Avocado slices
- Smoked salmon
- Herb-infused cream cheese
- Crispy bacon crumbles
Try new toppings to keep your waffles exciting. You can mix different ingredients to make your breakfast just right for you.
| Topping Category | Flavor Profile | Nutritional Benefit |
|---|---|---|
| Fresh Fruits | Sweet, Tangy | High in Vitamins |
| Nut Butters | Creamy, Rich | Protein & Healthy Fats |
| Savory Proteins | Hearty, Satisfying | Muscle Recovery |
Your coconut flour waffles are ready for your creativity. Go ahead and try new things. Make your breakfast both healthy and tasty!
Make-Ahead and Storage Solutions for Paleo Waffles
Preparing paleo waffles ahead of time can save you a lot of morning time. The right storage methods keep your coconut flour recipes fresh and tasty for weeks. Knowing how to freeze and reheat your waffles means you always have a quick, healthy breakfast.
Freezing your homemade paleo waffles needs careful steps to keep their texture and taste. Here’s how to keep your coconut flour waffles fresh:
- Cool waffles completely before freezing
- Separate waffles with parchment paper
- Use airtight freezer-safe containers
- Label containers with the date of preparation
Freezing Methods
Freezing your paleo waffles right is key to keeping them good. Wrap each waffle in plastic wrap or foil before putting them in a freezer bag. This stops freezer burn and keeps the waffle’s taste and texture.
Reheating Techniques
Getting your frozen paleo waffles crispy again is simple with the right method. Your best choices are:
- Toaster: Gives the crispiest results
- Oven: Keeps heating even
- Air fryer: Quickly makes them crunchy
Avoid microwaving, as it can make your coconut flour recipes soggy. For the best results, put the frozen waffle straight into the toaster or oven without thawing.
Mastering these storage and reheating tips means you’ll always have tasty, healthy paleo waffles ready when you need them.
Variations of Basic Coconut Flour Waffles
Turn your basic coconut flour waffles into exciting dishes! These grain-free waffles are perfect for creative cooks. By changing a few ingredients, you can make many tasty variations.
Try these delicious coconut flour waffle variations:
- Chocolate Chip Delight: Add sugar-free dark chocolate chips for a rich flavor
- Banana Nut Crunch: Mix in mashed bananas and chopped walnuts for a sweet treat
- Savory Herb Cheese: Add grated parmesan and fresh herbs like rosemary for a fancy breakfast
- Pumpkin Spice: Use pumpkin puree and spices for a seasonal favorite
When making coconut flour waffles, remember they soak up liquid differently. You might need to adjust the liquid to get the right texture. Feel free to create your own unique grain-free waffle recipe!
Pro tip: Start with a small batch when trying new recipes. This way, you can perfect your recipe without wasting food. Your taste buds will love the journey!
Troubleshooting Your Low-Carb Waffle Recipe
Making perfect low-carb waffles can be tough. But, with the right techniques, you can beat common cooking problems. Keto waffles need special care with ingredients and prep to get the right texture and taste.
Let’s look at some common issues with low-carb waffles and how to fix them:
- Sticky Waffle Iron Problem: Always grease your waffle iron well. Coconut flour keto waffles stick more than regular ones.
- Dry Texture Concerns: Use cream cheese or more eggs to keep your waffles moist.
- Uneven Cooking: Make sure your batter is mixed well and spread evenly in the iron.
Fixing texture problems is key for tasty low-carb waffles. Double-check your ingredient ratios.
| Problem | Solution |
|---|---|
| Dense Waffles | Separate egg whites, whip them, and fold back into batter |
| Crumbling Waffles | Add xanthan gum or psyllium husk for binding |
| Bland Flavor | Incorporate vanilla extract or cinnamon |
Keto waffles need patience and practice. Each batch teaches you about low-carb ingredients. Don’t worry if your first tries aren’t perfect.
Conclusion
Making coconut flour waffles opens up a world of tasty and healthy breakfasts. These waffles are a great choice for those who want something gluten-free and full of nutrients. They taste great and feel good to eat.
Creating perfect coconut flour waffles takes time and effort. Try different recipes and toppings to find your favorite. Every batch you make brings you closer to being a pro at making coconut flour waffles.
Your new skills in making healthy waffles will wow your family and start your day off right. Coconut flour waffles are perfect for many diets, including keto, paleo, and gluten-free. Be brave in the kitchen and try new things.
Begin your coconut flour waffle journey today. Share your creations with loved ones and encourage others to try them. Your adventure with coconut flour waffles is just starting!
Free Body Calculator – Know Your Body
Wondering if your body is in a healthy range? Use our Free Body Calculator to find out if you’re fit, normal, or need a lifestyle change. Get personalized tips, calorie targets, and your ideal protein, carbs, and fat intake – all in seconds.
Try Free Body Calculator Now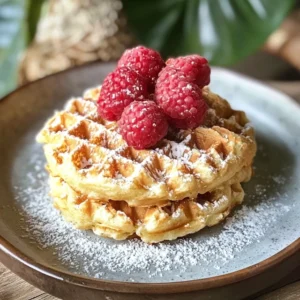
How To Make Coconut Flour Waffles: Fluffy And Flavorful
Ingredients
- ¼ cup coconut flour
- 4 large eggs
- ¼ cup milk of choice dairy or non-dairy like almond or coconut milk
- 2 tablespoons coconut oil or melted butter
- 1 tablespoon maple syrup or low-carb sweetener optional
- ½ teaspoon baking powder
- ½ teaspoon vanilla extract
- Pinch of salt

Instructions
- Preheat your waffle iron according to manufacturer’s instructions.
- Mix Ingredients:
- In a bowl, whisk together eggs, milk, melted coconut oil, vanilla, and sweetener.
- Add Dry Ingredients:
- Stir in coconut flour, baking powder, and salt. Let the batter sit for 2–3 minutes so it thickens.
- Cook:
- Lightly grease the waffle iron and pour in the batter (about ¼ cup per waffle). Cook until golden brown and crispy, usually 3–4 minutes.
- Serve:
- Top with fresh berries, syrup, nut butter, or yogurt.
Notes
- Make it savory: Skip the sweetener and add herbs or cheese.
- Batter may seem thick that’s normal with coconut flour. Add a splash more milk if needed.
- Freezer-friendly! Reheat in a toaster or oven.